
Your very own hand-made competition spec KettleBALL
The kettlebell is one of the most useful, versatile training tools in existence.
It is not elitist. It is literally the tool for ALL the people. Inexpensive, universal.
Rich or poor, novice or expert…kettlebell training is beneficial to anyone and everyone.
The only problem….the casting process, particularly of competition kettlebells, is usually complicated, so not everyone has access to kettlebells…YET!
The IKFF is about sharing the love… create unity, and bring wellness to EVERYONE.
Well, in order to share the love, we at IKFF have come up with a method that will allow EVERYONE to make their own… very, very close to competition spec KettleBALL.
Using simple, accessible, back yard tools and requirements, here’s a very simple recipe to manufacture your own
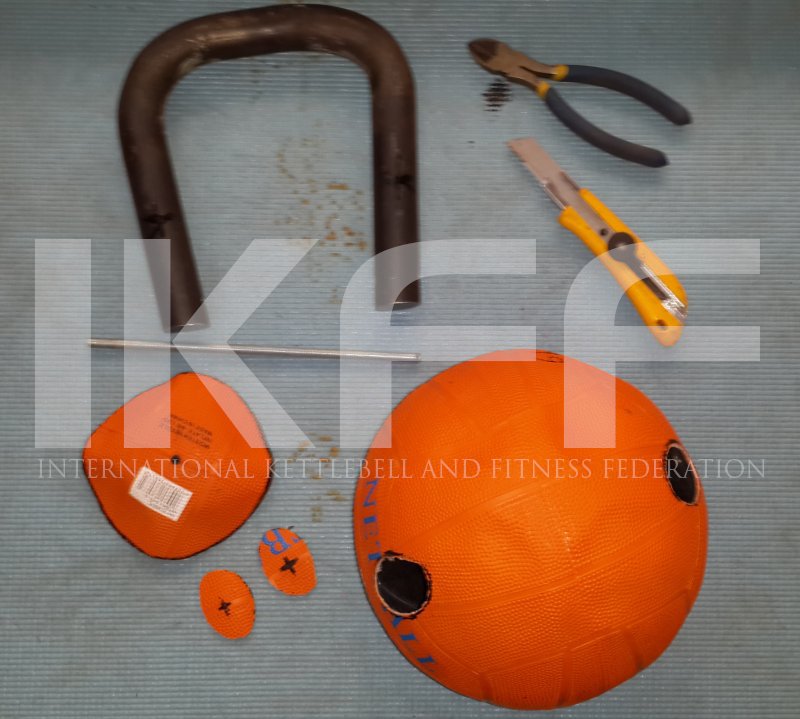
Things you need
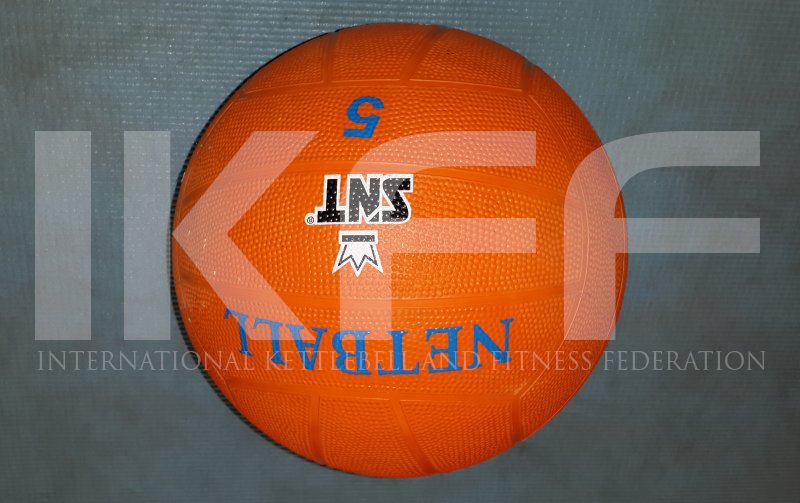
- A netball, or soccer BALL – size 5 (which, can be an old, retired one, or which can be bought)
This has an outer diameter of 210mm – the same as a competition kettlebell
(I personally find the new-style rubberised ones to be stronger and easier to work with)
- A piece of 34.2mm (1 1/3 inch) round-bar to bend into a handle (If you use solid bar, the handle is about 3.3kg-3.5kg on its own)
in total the used length is about 600mm, but you may need to start with a longer piece to achieve the bends, and then cut off the excess
[you COULD also use tube/pipe, but it is more expensive, and harder to bend with a small corner radius without kinking the corners unless you have access to fancy pipe bending machinery]The bar is bent to form a slight inward taper – this forms a wedge for the filling material to lock the handle in place
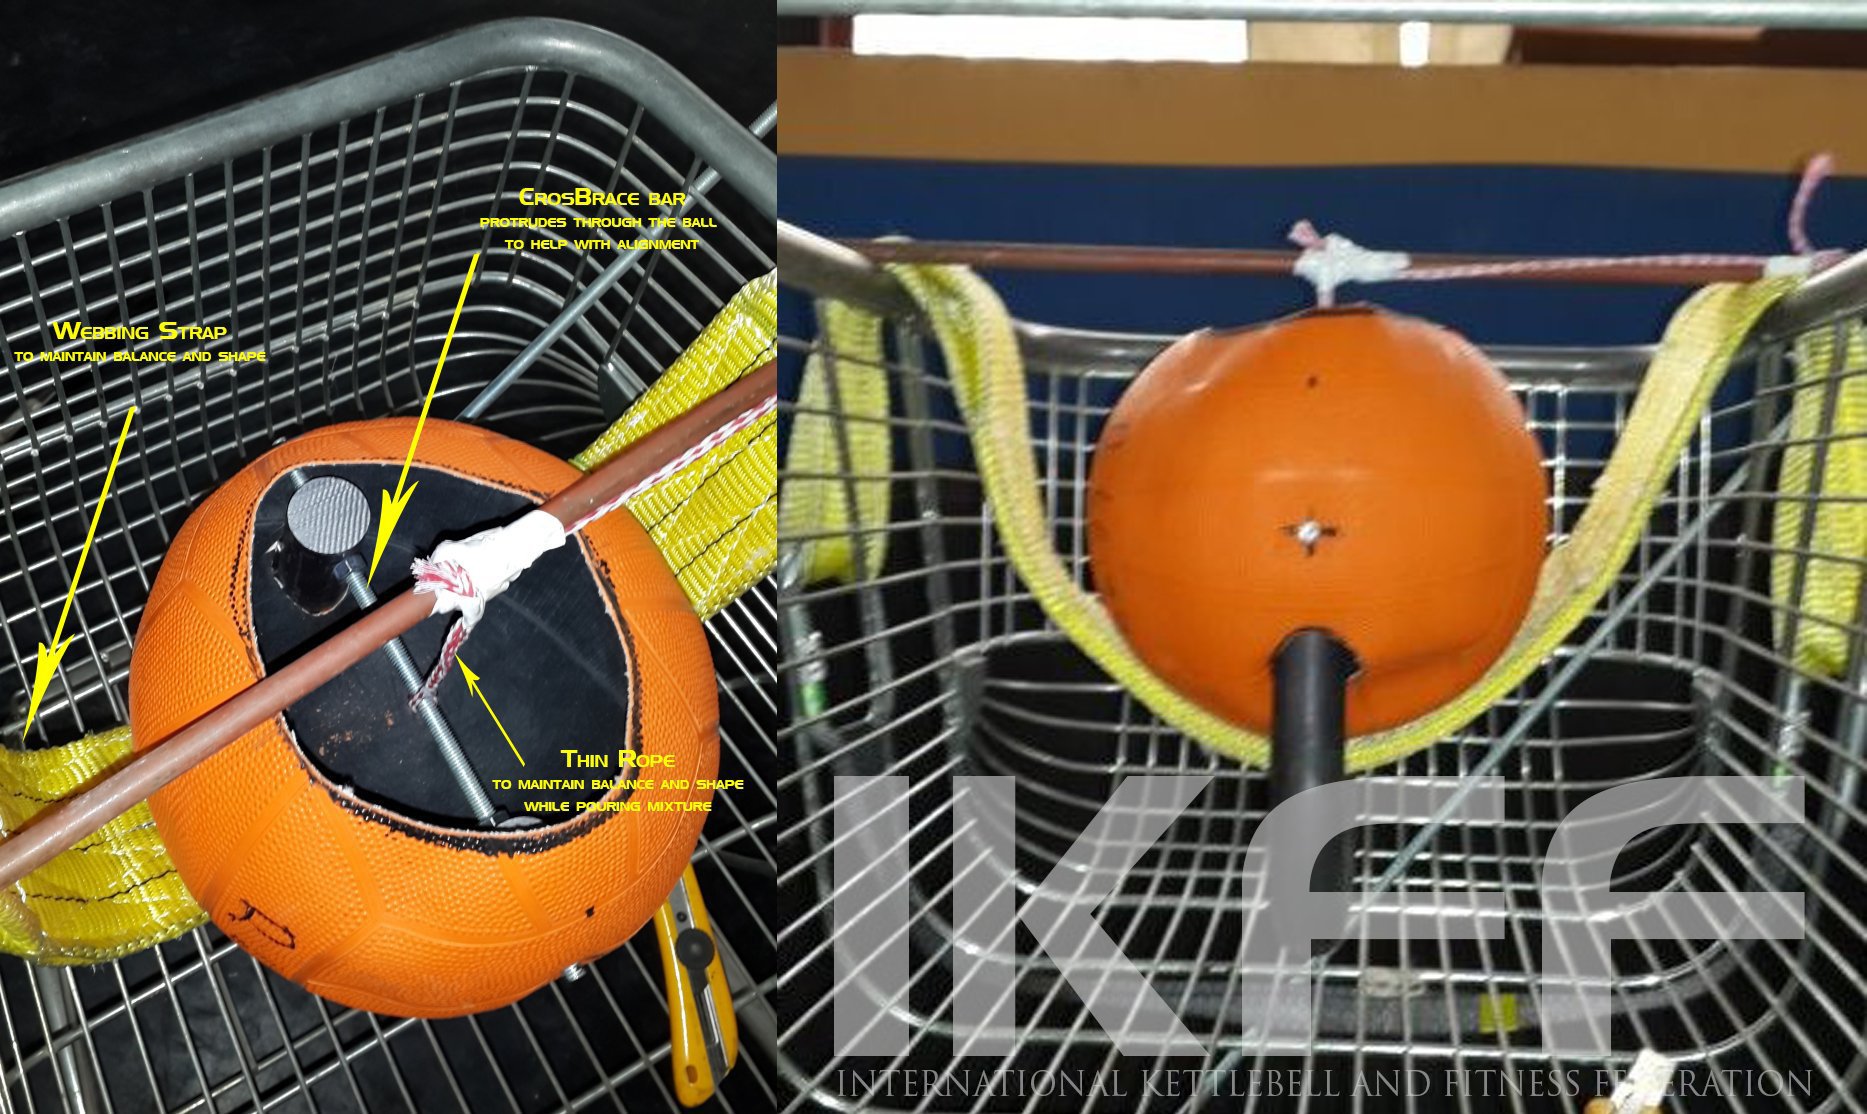
The wedge, combined with the CrossBrace bar, will ensure that the ball part never flies off the handle, even if the filler cracks - A piece of 8mm or 10mm round-bar (to make a cross-brace)
the CrossBrace shown is a piece of 8mm threaded bar – use whatever you have
the holes 8mm/10mm to match the bar you select) for the CrossBrace are drilled AFTER the bending is finished, so that the bar can feed all the way through and protrude through the ball (for alignment). The distance from the top of the handle, to the axis of the cross-brace holes, should be 200mm as shown in the pictureThe CrossBrace also adds strength to prevent the handle from moving once the filler has dried
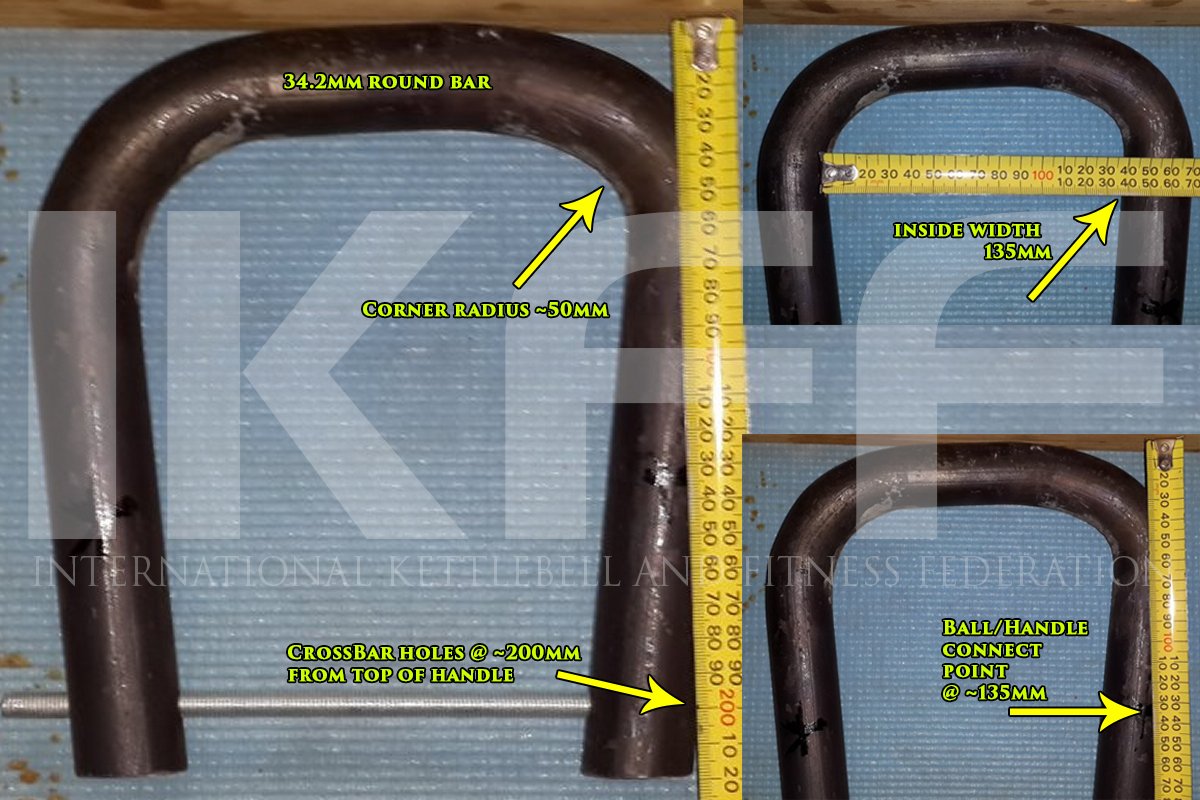
- the “connect-point” of the handle to the ball is at about 135mm from the top of the handle,
- the inside dimension of the bent handle is also 135mm,
- the base/pouring hole is also 135mm (as we discovered by pure chance).
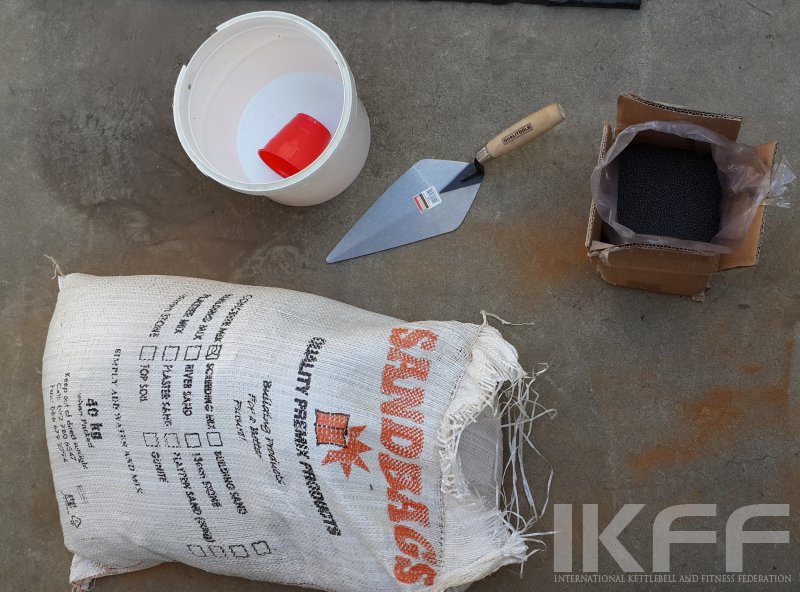
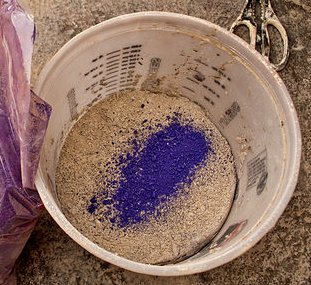
- Some concrete mix (enough to fill a ball, which is several litres in capacity)
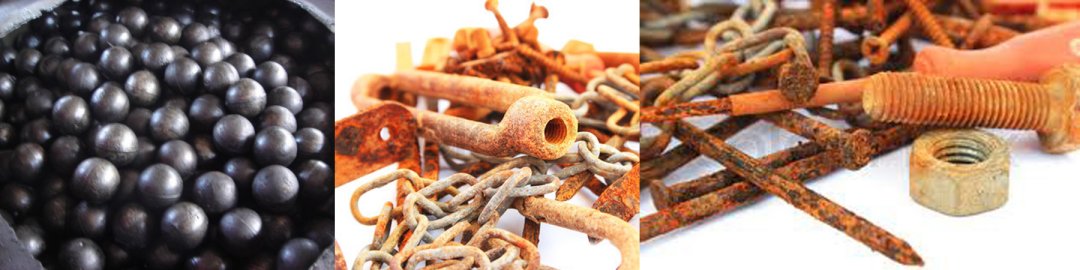
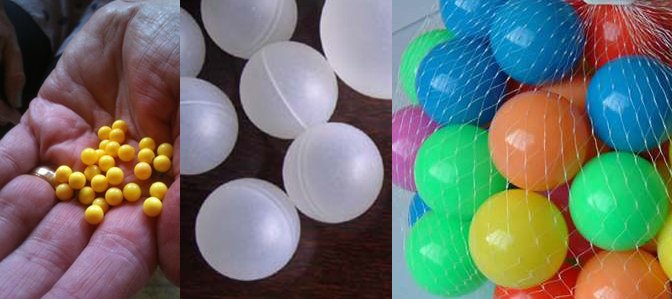
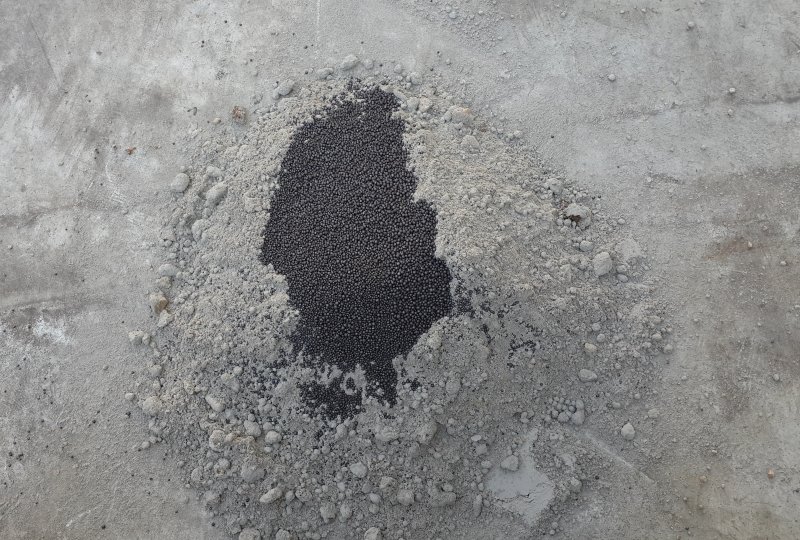
- Some steel shot, metal scraps, old nuts and bolts, or ball bearings – basically anything which is heavy – to act as filler if you want to make your kettlebell heavier
In this example, I mixed in about 15kg of steel shot. This kettlebell weighs 22.6kg
You can use anything. rusty nails, screws, bolts, nuts, wire scraps…whatever
OR
Some plastic/wood/rubber scraps, like marbles, or golf balls – basically anything which is light – to act as filler if you want to make your kettlebell lighter
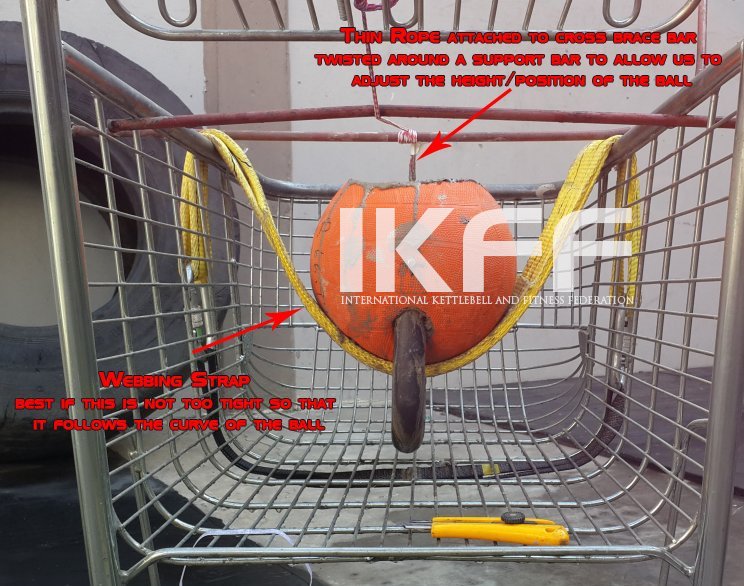
- A piece of webbing, or a lifting strap – nice and wide…to rest the ball on while filling it, to keep the profile nice and neat

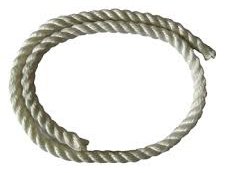
The one shown can hold 3 tons – we will only load it with ~30kg - A small piece of thin nylon rope (~3-5mm is strong enough) [about 1 metre long], utility knife or side-cutters to cut the holes in the ball etc
- A shopping trolley (optional) to suspend it in while filling and drying [most useful, since it’s on wheels, and allows you to move it wherever you need to]

The Method
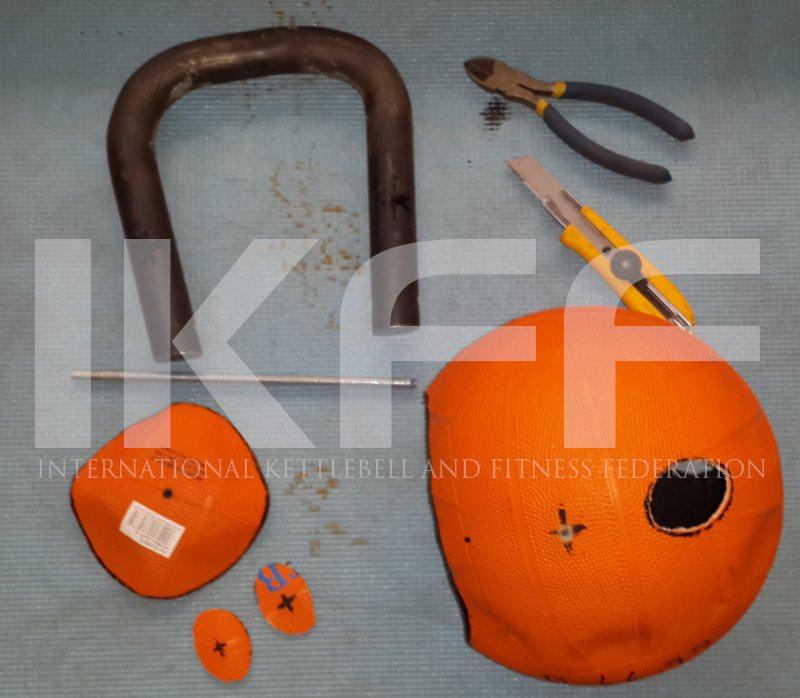
Start with the ball. You need to mark the holes for the handle, and for the cross-brace bar, and the base (hole) which will create a flat bottom, and pouring hole
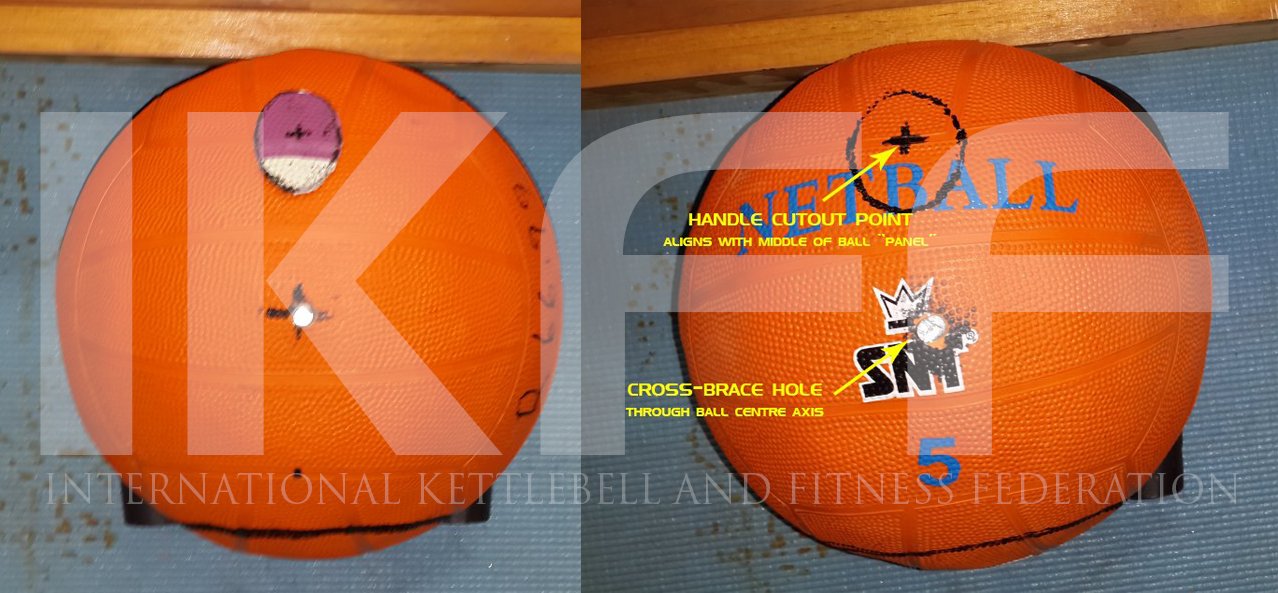
On a size 5 ball, the panels are co-incidentally in the exactly correct position for this purpose. Mark 2 points as shown
Mark 2 further points in line with those – directly through the centre of the ball. This is the line where the cross-brace bar will protrude through the ball
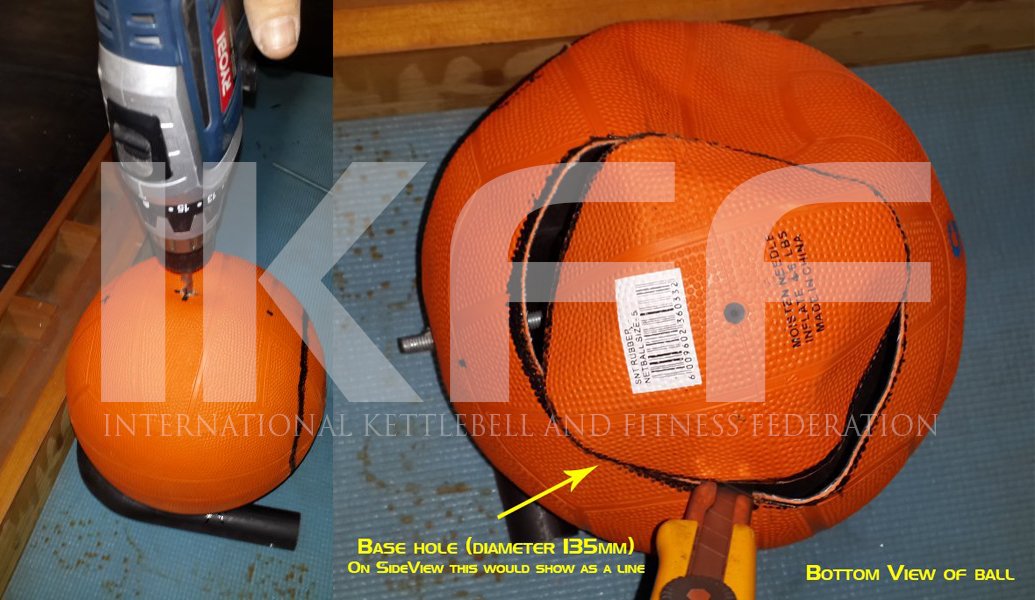
Mark a circle on the bottom of the ball for the base hole (diameter is ~135mm). (On the side view of the ball this will show as a straight line)

This allows for easy alignment of the handle is the correct position, and also keeps the ball in place while filling.
It can also used (with the piece of thin rope) to keep the assembly stable/straight while it is drying
Using the elipse template, mark the handle hole cutouts
Drill the cross-brace holes (which will pop the ball) – and cut out the holes for the base and handle
You should now be left with all the parts/pieces you need
Mix the concrete with the filler material of choice (either shot etc to make it heavier, or plastic etc to make it lighter)
Position the assembly in the shopping trolley frame by feeding the webbing-sling through the handle.
You can use the thin rope which is connected to the cross-brace to keep it in position while you fill it, and while it dries
Pour in the mixture. Best to use a thin metal rod to prod the mixture in order to ensure that there are not too many bubbles, and to ensure that the mixture fills all the space.
Wait for it to dry! 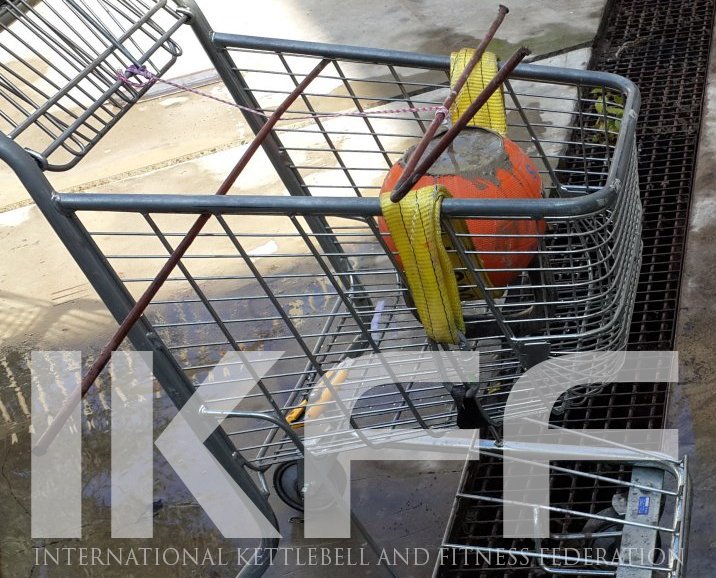
You should probably clean up the edges of the cross-brace by filing or grinding them smooth, and also trim any excess rubber from the base hole. You could also use a grinder to polish the base to a nice smooth flat surface.
do NOT remove the ball-skin. Concrete is brittle, and will probably crack or split. The rubber outer skin will help with strength.
A size 5 ball is 210mm diameter
The round-bar handle is 34.2mm
If positioned as described above – with the cross-brace bar through the centre of the ball, and the base hole of 135mm diameter … the height will be 280mm
There it is…ladies and gentlemen of the 3rd (or 1st) world – your very own hand-made competition spec kettleBALL 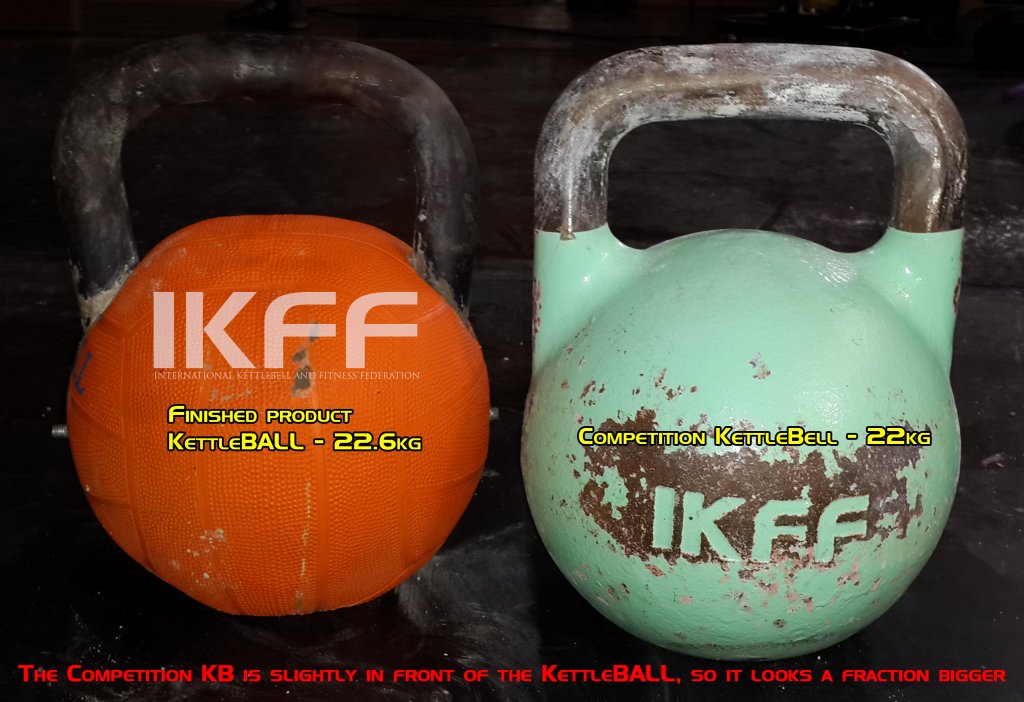
Cost (aside from labour/time – assuming that we bought all the components – although using old scrap is MUCH cheaper)
- ball R40 (~$4)
- steel bar for handle + cross-brace R25 (~$2.50)
- concrete mix (R40 for 40kg, of which we used 1/5th) R10 (~$1)
- metals bibs-and-bobs/filler R25 ($2.5)
TOTAL: R100 ($10) – and you can make it pretty much any weight you like